In my last post, I mentioned that we would be
using the Sheltering Tree Stamp Set from the Stampin’ Up! 2015 Occasions
Catalog and the Scallop Tag Topper Punch for this month’s club card. Well, it
has been a busy month for me and by Friday night I still hadn’t gotten my act together
for club on Saturday. I needed some inspiration! Once I saw the sketch challenge
from Freshly Made Sketches – “EUREKA!” I knew that was it. Try as I might, I
was unable to incorporate the Scallop Tag Topper Punch into the sketch. (Never
fear, it will return because you know I love cards with tags!!) Now, back to
business.
Rita, a member of the design team at Freshly Made Sketches, has come up with a beautiful “clean-lined” design. Here it is…

Now here’s my card...
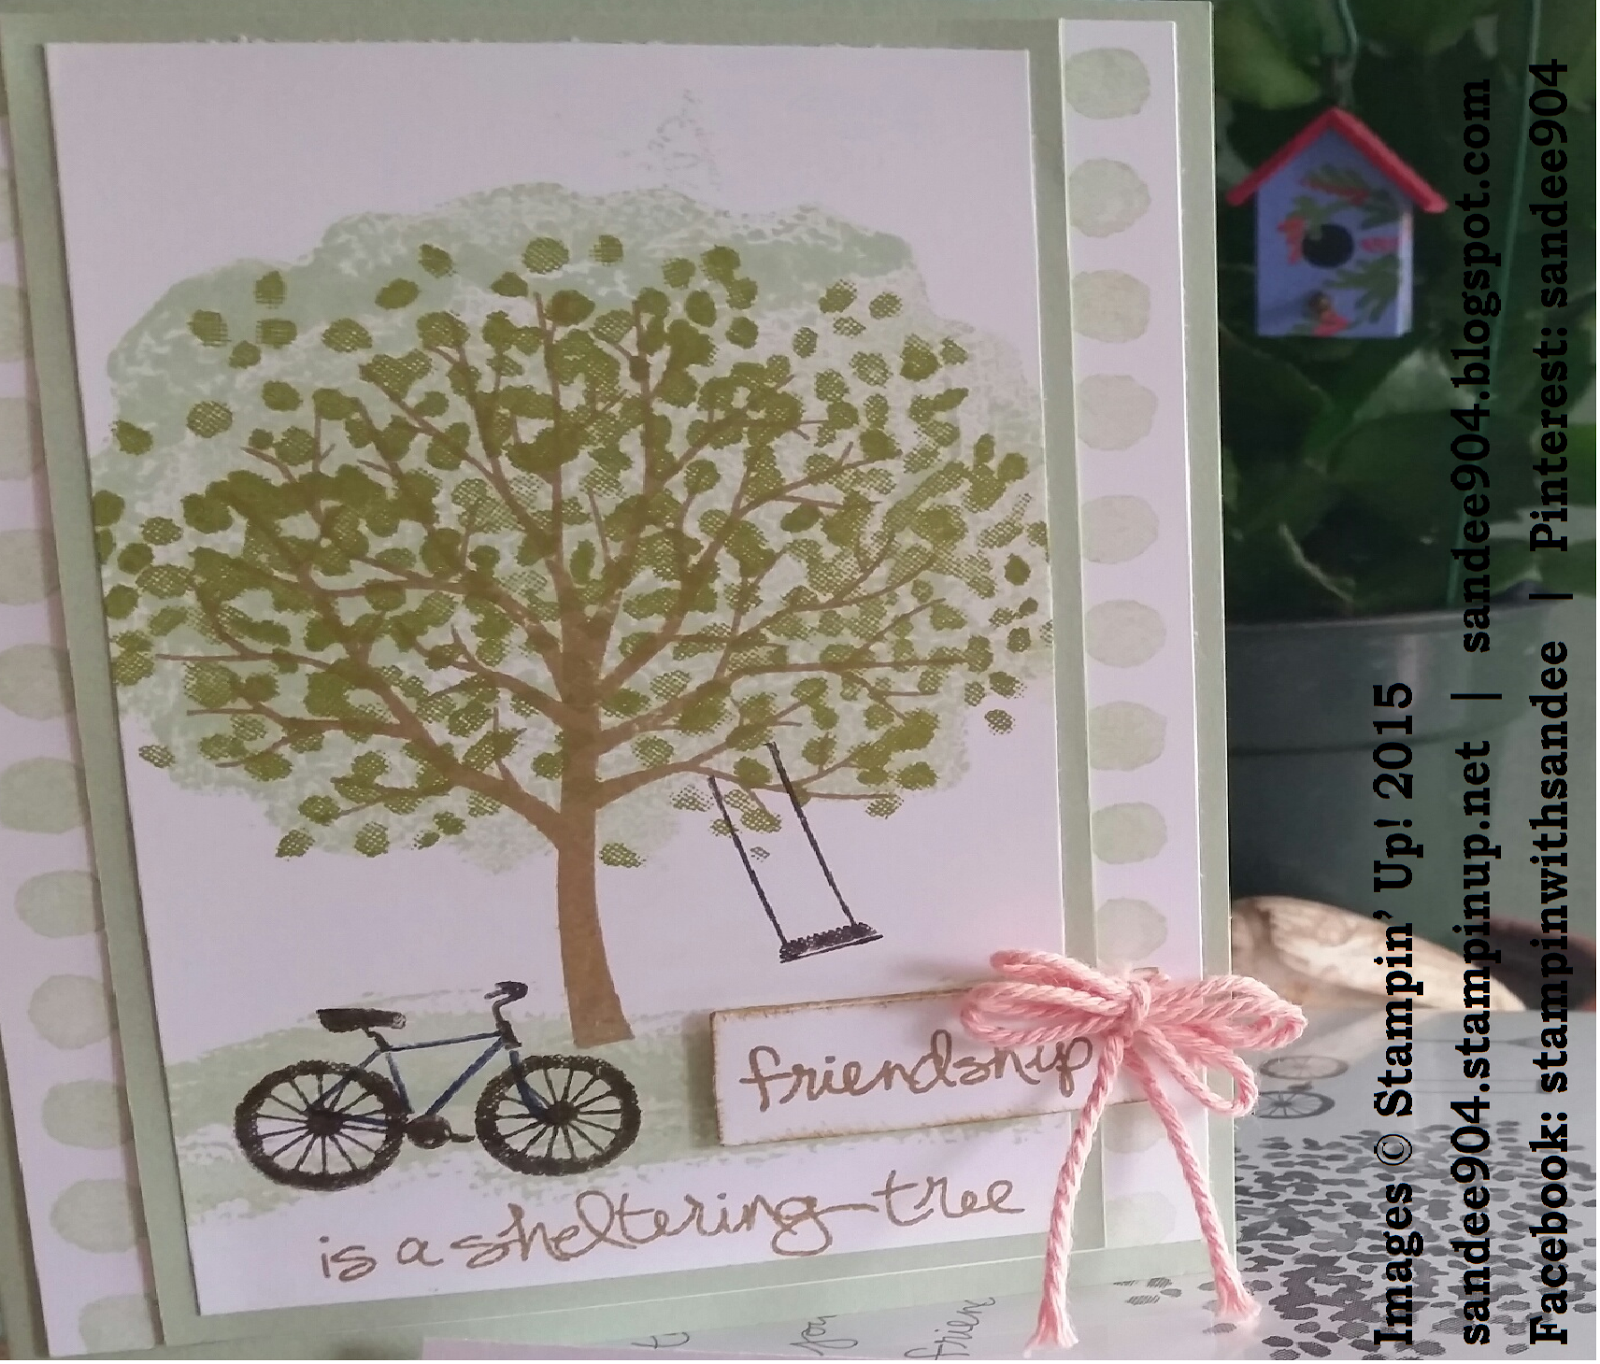
The Sheltered Tree stamp set I am using is a photopolymer set which allowed for some “reverse image” stamping. What is “reverse
image” stamping you say? Well, just that – reverse the image! Adhere the
detailed image side of the stamp to the clear block and ink the flat side, or
the reverse side of the stamp, which created this wonderfully full-blooming
tree effect (affectionately nicknamed the blob effect at club). I used 2013-15
In Color Pistachio Pudding (really going to hate to see this color retire in
June!) for the full bloom effect. Clean the stamp and adhere the flat side of
the image to a clear block and ink the intended leaf image in Old Olive. Line it
up with the “blob” and stamp. Turned out nicely. The color for the tree trunk is
2013-15 In Color Baked Brown Sugar (pause for sadness to fade again). The tree
swing and bicycle is stamped in Early Espresso. The bicycle frame is stamped in Night of
Navy.
I decided to use the stamp set’s signature
sentiment, “Friendship is a sheltering tree.” I love the sentiment, and really love
the font! To keep to the design of the sketch challenge, I masked the sentiment
and inked in Baked Brown Sugar the word “friendship.” Although it is hard to
see, the word is cut out using the smallest banner die cut, some quick sponging
of Baked Brown Sugar around the edges, and affixed to the right side of the
card just below the swing. The bow is created with 3 loops using the Crisp
Cantaloupe Thick Baker’s Twine. In this picture it hides the “flag” portion of
the banner. Reversing the banner so that the flag pointed left instead of right
would be a better choice.
To finish the card, I layered on slightly
larger Pistachio Pudding card stock, layered again on Whisper White card
stock (trimmed with a row of circles from the Painted Petals stamp set — my
favorite Stampin’ Up! stamp set), and adhered to a Pistachio Pudding card stock
base of 51/2 x 4 1/4.
If you would like specific dimensions and
instructions to create your own card, please e-mail me and I will be happy to
share them with you. And if you don’t already have a Stampin’ Up! demonstrator,
it would be my honor if you selected me to help you in your future creations!
Stamp on!
Sandy
sandee904@yahoo.com
sandee904.stampinup.net | sandee904.blogspot.com
Facebook: stampinwithsandee | Pinterest: sandee904
No comments:
Post a Comment