Showing posts with label Sheltering Tree. Show all posts

Sunday, October 25, 2015

Halloween Greetings with If the Broom Fits paired with Sheltering Tree stamp sets

I am off schedule a bit for posting this month’s feature card. No excuse for that except it has been a busy month.

This month’s club featured fall and Halloween cards. Today we will shine the spotlight on the adult humor of Stampin’ Up stamp set, If the Broom Fits.  I loved the sentiment, “If the broom fits, ride it” but I was having difficulty with taking this up a level from just stamping the image, framing it on DSP and adding a ribbon. I found a cute card on YouTube by SU demonstrator Janet Wakeland, which we cased with some small variations. You can see her card and video here.  https://www.youtube.com/watch?v=LhYXTqNJDYk  This is our interpretation.

Then this weekend while I was catching up on the blogs I follow, I found inspiration from SU demonstrator Brian King and recent card created with the Sheltering Tree stamp set – which is my favorite stamp set! For my card, start with stamping the tree image in Early Espresso Classic. Create the foliage with stamping the reverse of the leaves image in Hello Honey Classic Ink and then the leaves in Cajun Craze Classic Ink. Next mask off and stamp one (1) broom (hard to pick just one) in Early Expresso above the tree and color with Stampin’ Write Markers (I used Pumpkin Pie and Crumb Cake). Before the next step, stamp in 2015-17 Mossy Meadow Classic Ink the ground effects image multiple times. (I tried Early Espresso on my first draft, however, IMHO it made the card look too, too drab.)

I have really started to get the hang of creating sky backgrounds. The next step is very important, using a clear wax crayon (you know, the kind you get in an dye kit) carefully trace along the outside edges of the tree, leaves and ground and cover the broom entirely. This way, when you sponge the sky, you can get closer to these images without altering the color. I used Pacific Point Classic Ink first to completely cover all the white remaining on the card front, followed by a small amount of Night of Navy Classic Ink towards the top of the card. If it "bugs" you, use the heat gun for a bit to remove any remnants of the wax crayon.

The moon is a circle (#4 from the center of the CirclesCollection dies) in Hello Honey after masking and stamping the first part of the sentiment. Be sure to leave some room for a small bit of the broom to give the illusion that a witch is racing across the sky in front of the moon. Line up the broom on the moon with the broom on the card and pop up with Stampin’ Dimensionals. (If you are certain of your placement, you could inlay the moon, but I liked the dimension added effect.) Stamp the rest of the sentiment, “ride it,” on a Whisper White and short punch with the Word Window Punch. Place it on the broom stick.

Finishing touches. The house is cut free hand from a scrap (about 1” by 3”) of Basic Black, and some strategically placed bats using Stampin’ Write Marker in Basic Black.

Love to see your samples. Send me an email.

Stamp on!

Sandy
sandee904@yahoo.com

sandee904.stampinup.net | sandee904.blogspot.com
Facebook:  stampinwithsandee | Pinterest:  sandee904

Sunday, June 14, 2015

Sheltering Tree Stamp Set by Guest Designer

Yesterday was Andrea’s stamping party. It was really a card buffet, but I think I have some new stamping addicts! It was a fun time with a great group of people. I was amazed at the talent of the three (3) young stampers – Andrea’s niece and her third (we think) cousins. I had several cards designed for the adults and youngsters and a couple of cards designed specifically for the youngsters for father’s day. They did a marvelous job with the cards and made them their own.

On this day, Andrea was on a mission! She was on a mission to create a card using the Sheltering Tree Stamp Set by Stampin’ Up! Her vision was to cover the tree with embossed flowers (using the leaves image) on a sheet of vellum. It turned out beautiful. Tell her how much you LUV it below.

Of course, I couldn’t have a stamping party at Andrea’s without bring her favorite retired Stampin’ Up! stamp set, Because I Care. I didn’t have a card designed though – I left it to Andrea to come up with something herself. I had no doubt that she could handle it. Here’s her card.

I hope you enjoy Andrea’s cards as much as I did. I will post June’s club card next week.


Stamp on!

Sandy
sandee904@yahoo.com

sandee904.stampinup.net  |  sandee904.blogspot.com
Facebook:  stampinwithsandee  |  Pinterest:  sandee904

Sunday, April 19, 2015

Sheltering Tree Stamp Set for FMS182

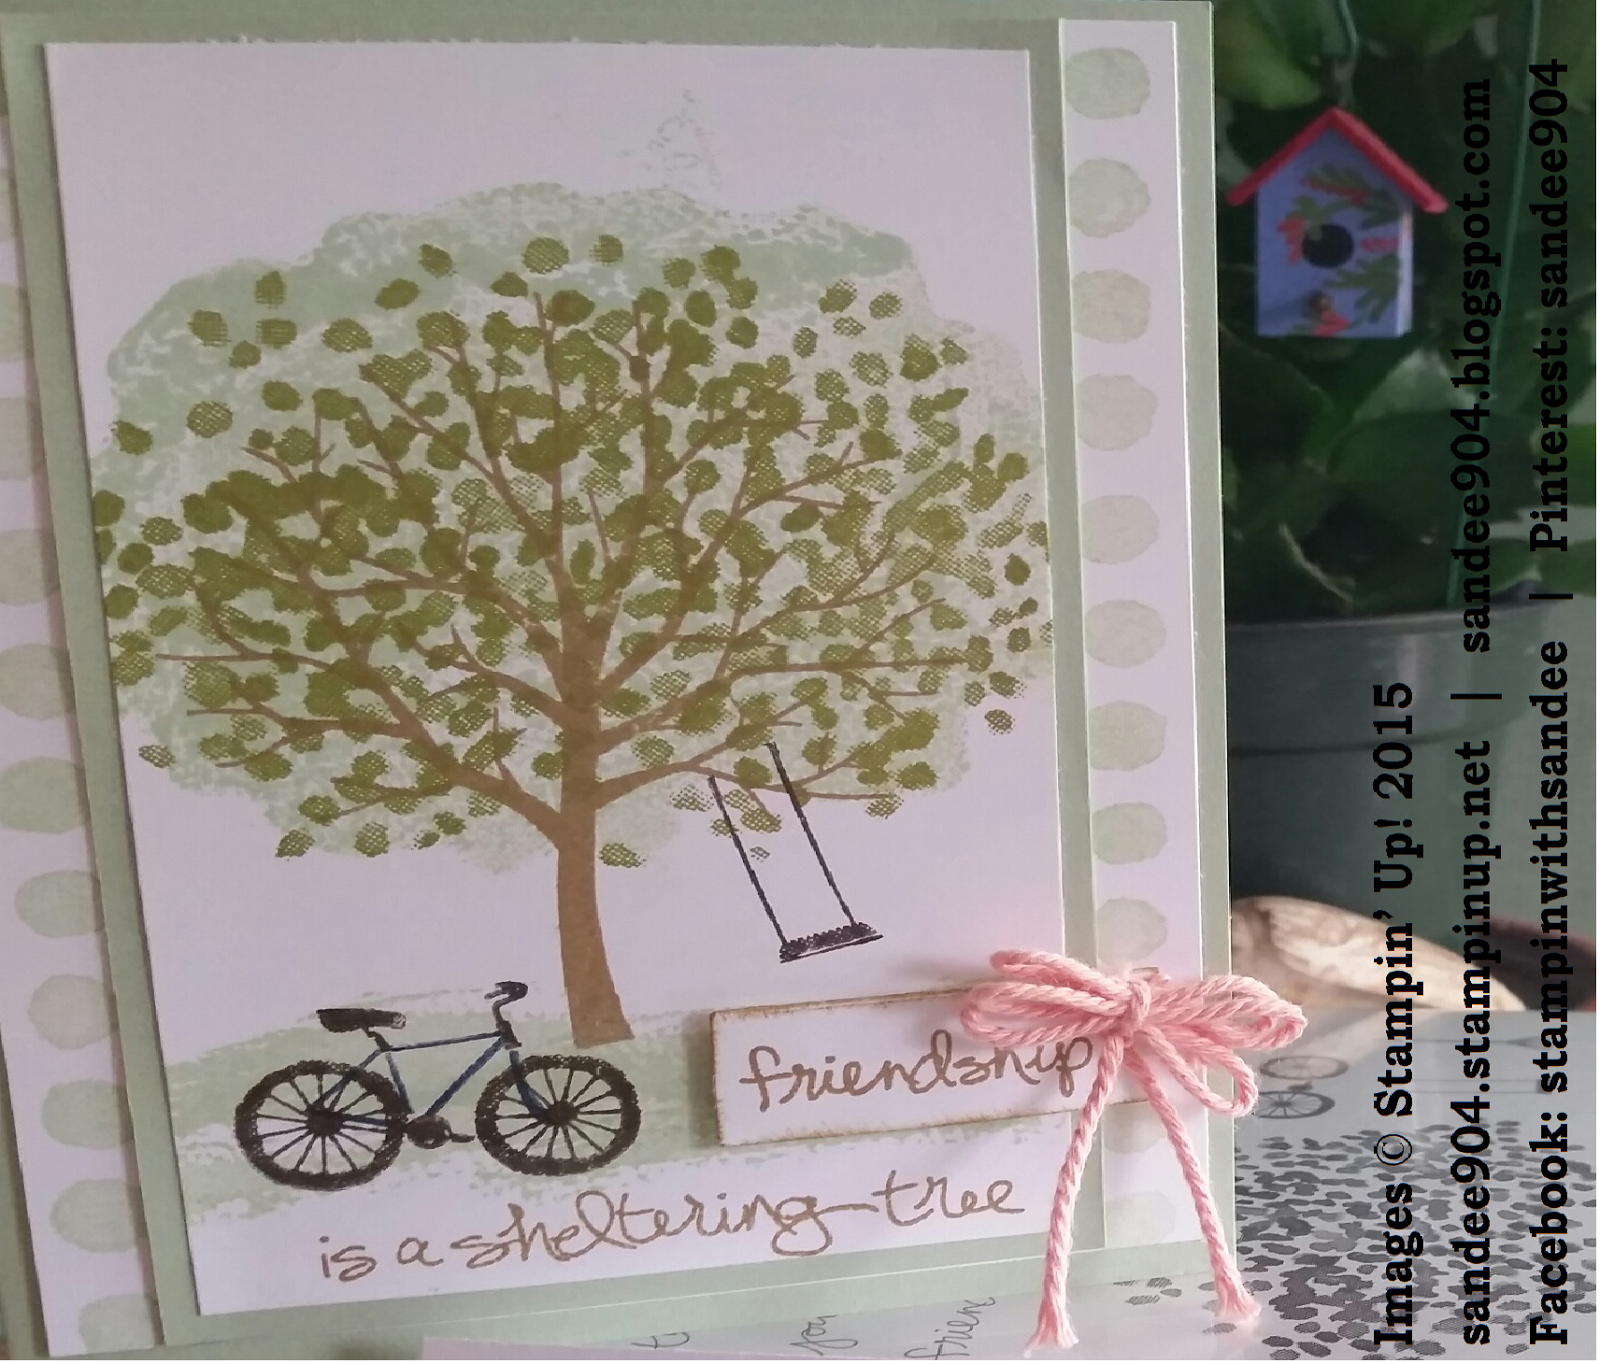
In my last post, I mentioned that we would be using the Sheltering Tree Stamp Set from the Stampin’ Up! 2015 Occasions Catalog and the Scallop Tag Topper Punch for this month’s club card. Well, it has been a busy month for me and by Friday night I still hadn’t gotten my act together for club on Saturday. I needed some inspiration! Once I saw the sketch challenge from Freshly Made Sketches – “EUREKA!” I knew that was it. Try as I might, I was unable to incorporate the Scallop Tag Topper Punch into the sketch. (Never fear, it will return because you know I love cards with tags!!) Now, back to business.

Rita, a member of the design team at Freshly Made Sketches, has come up with a beautiful “clean-lined” design. Here it is…


Now here’s my card...


The Sheltered Tree stamp set I am using is a photopolymer set which allowed for some “reverse image” stamping. What is “reverse image” stamping you say? Well, just that – reverse the image! Adhere the detailed image side of the stamp to the clear block and ink the flat side, or the reverse side of the stamp, which created this wonderfully full-blooming tree effect (affectionately nicknamed the blob effect at club). I used 2013-15 In Color Pistachio Pudding (really going to hate to see this color retire in June!) for the full bloom effect. Clean the stamp and adhere the flat side of the image to a clear block and ink the intended leaf image in Old Olive. Line it up with the “blob” and stamp. Turned out nicely. The color for the tree trunk is 2013-15 In Color Baked Brown Sugar (pause for sadness to fade again). The tree swing and bicycle is stamped in Early Espresso. The bicycle frame is stamped in Night of Navy.

I decided to use the stamp set’s signature sentiment, “Friendship is a sheltering tree.” I love the sentiment, and really love the font! To keep to the design of the sketch challenge, I masked the sentiment and inked in Baked Brown Sugar the word “friendship.” Although it is hard to see, the word is cut out using the smallest banner die cut, some quick sponging of Baked Brown Sugar around the edges, and affixed to the right side of the card just below the swing. The bow is created with 3 loops using the Crisp Cantaloupe Thick Baker’s Twine. In this picture it hides the “flag” portion of the banner. Reversing the banner so that the flag pointed left instead of right would be a better choice.

To finish the card, I layered on slightly larger Pistachio Pudding card stock, layered again on Whisper White card stock (trimmed with a row of circles from the Painted Petals stamp set — my favorite Stampin’ Up! stamp set), and adhered to a Pistachio Pudding card stock base of 51/2 x 4 1/4.

If you would like specific dimensions and instructions to create your own card, please e-mail me and I will be happy to share them with you. And if you don’t already have a Stampin’ Up! demonstrator, it would be my honor if you selected me to help you in your future creations!

Stamp on!


Sandy
sandee904@yahoo.com

sandee904.stampinup.net  |  sandee904.blogspot.com
Facebook: stampinwithsandee | Pinterest: sandee904